Ambient & Vacuum Nanoindenter
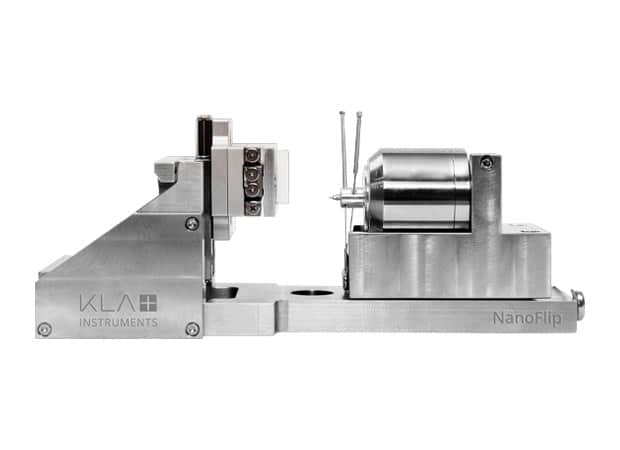
NanoFlip
2. Hardness, young's modulus, elastic limit and other nanomechanical tests
3. In situ test
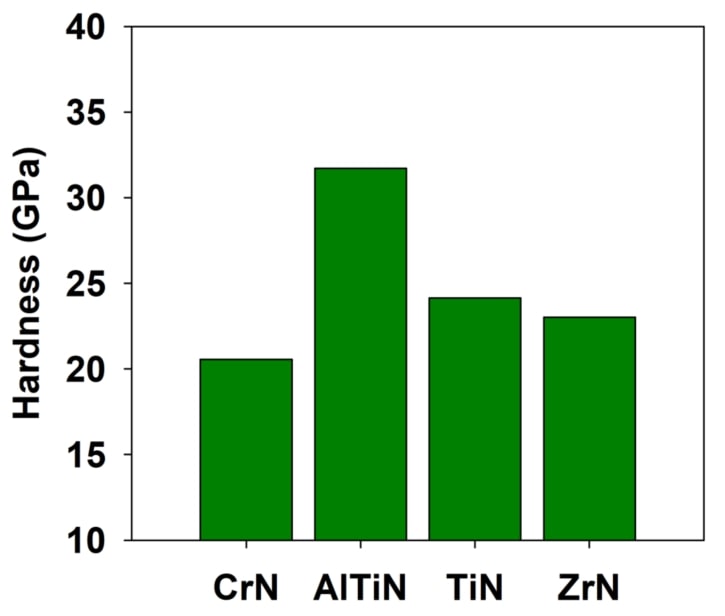
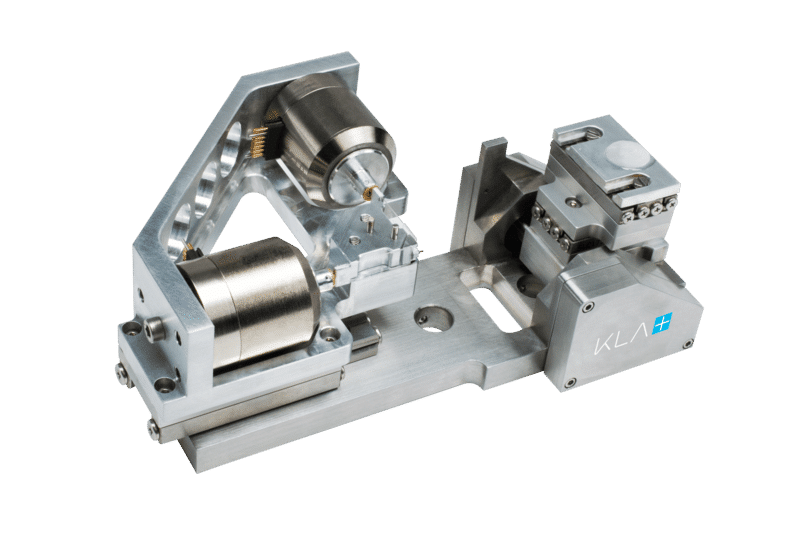
The NanoFlip nanoindentor measures hardness, modulus, yield strength and other nanomechanical tests under ambient and vacuum conditions. The vacuum compatible NanoFlip performs in situ testing in scanning electron microscope (SEM) and focused ion beam (FIB) systems. It can also be used in ambient conditions with microscopes, atomic force microscopes (AFM) and 3D profilometers.
Applications of nanoindentation
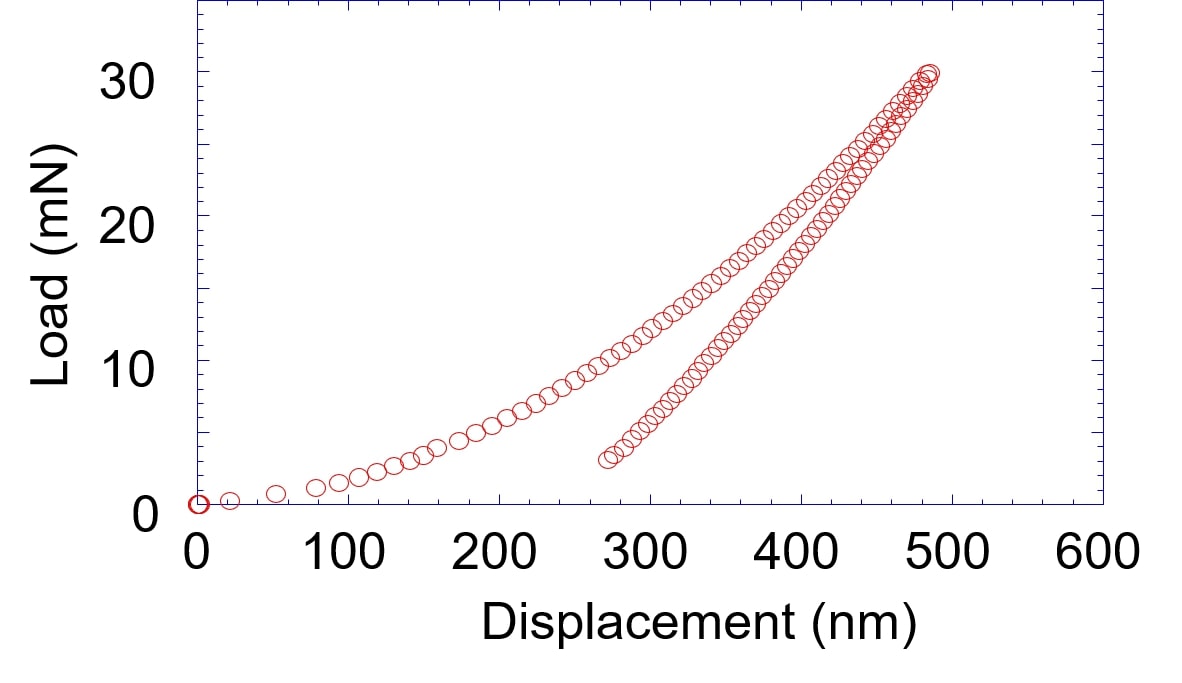
- Hardness and modulus measurements (Oliver-Pharr)
- Continuous stiffness measurement
- High-speed hardware property cards
- ISO 14577 hardness test
- Nano dynamic mechanical analysis (DMA)
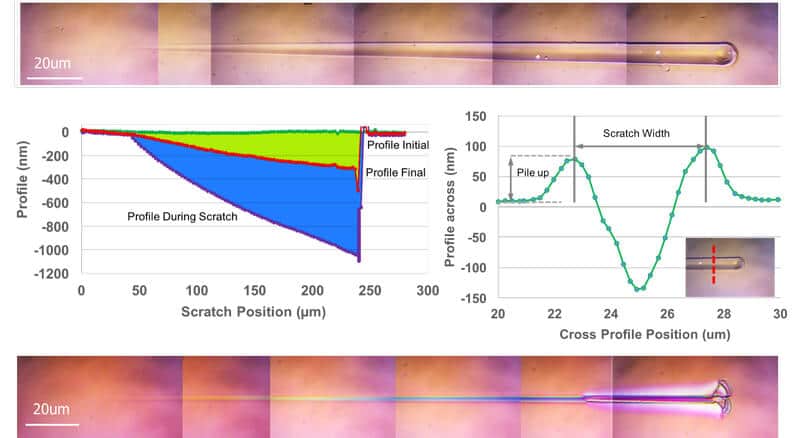
- Quantitative scratch and wear tests
- Industries
- Universities, research laboratories and institutes
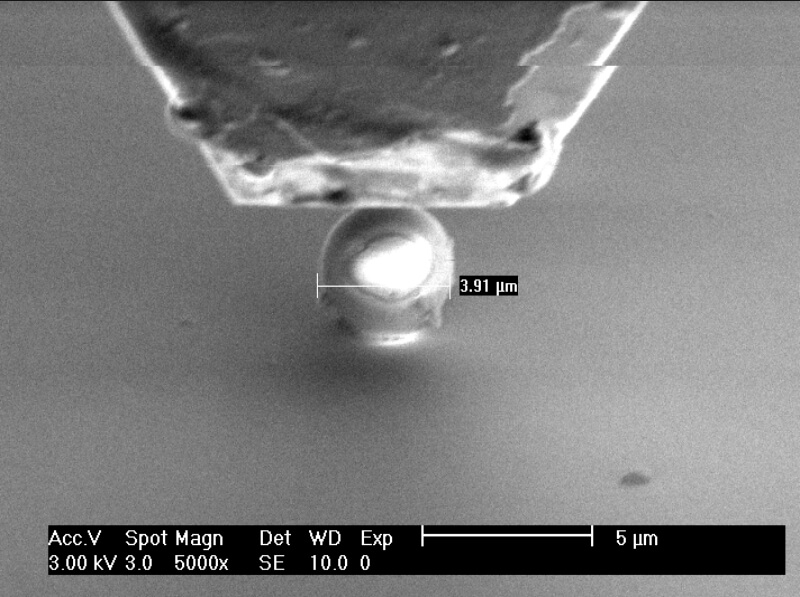
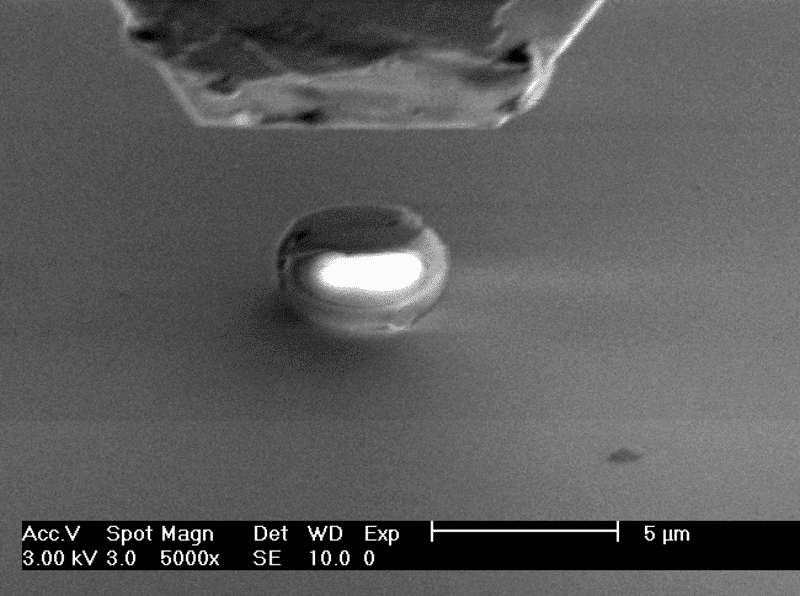
- Manufacture of pillars and microspheres
- MEMS: micro-electro-mechanical systems
- Material manufacturing (compression / tensile / structural failure tests)
- Manufacture of batteries and components
- Universities, research laboratories and institutes
More info on applications
- Adhesion
- Hardness
- Young module
- Scratch
Nanoindentation for ambient and vacuum
The NanoFlip has a high precision XYZ movement to position the sample to be tested and an inversion mechanism to position it. InView software comes with a series of test methods that cover a range of test protocols and also allows users to create their own test methods. The InForce50 actuator works in both vacuum and ambient conditions. SEM images or other microscopic images can be recorded by InView software and synchronized with mechanical test data. The revolutionary FIB-to-Test technology allows the sample to be tilted 90 °, allowing a smooth transition from the FIB test to the indentation test without having to remove the sample.
ADVANTAGES
- Hardness, young's modulus, elastic limit and other nanomechanical tests
- In situ test
- InForce 50 actuator for capacitive displacement measurement and electromagnetic force actuation with interchangeable tips
- InQuest high speed controller electronics with 100 kHz data acquisition rate and 20 µs time constant
- XYZ motion system for sample targeting
- SEM video capture for SEM images synchronized with test data
- Unique tip calibration system built into the software for fast and accurate tip calibration
- InView control and data verification software with Windows® 10 compatibility and developer of methods for user-designed experiments
Options


Continuous stiffness measurement (CSM)
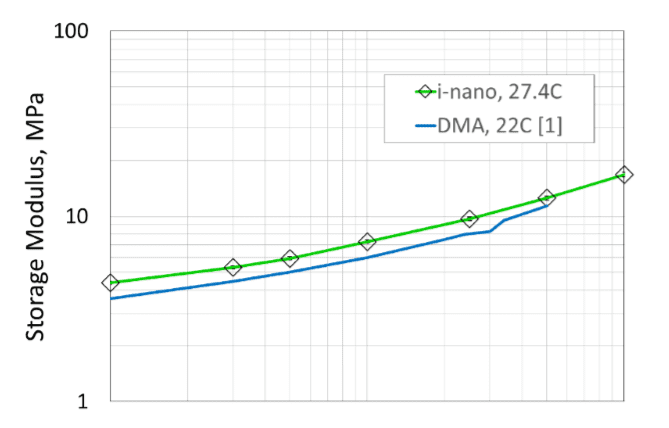
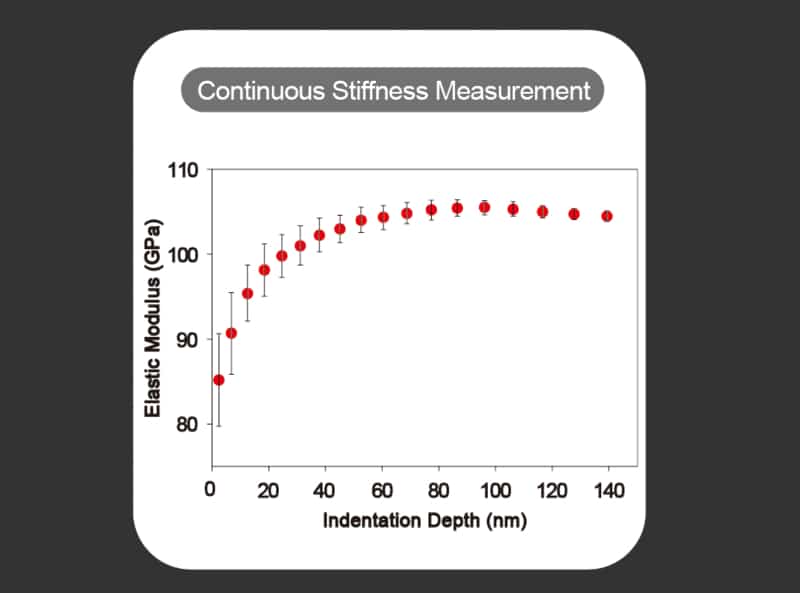
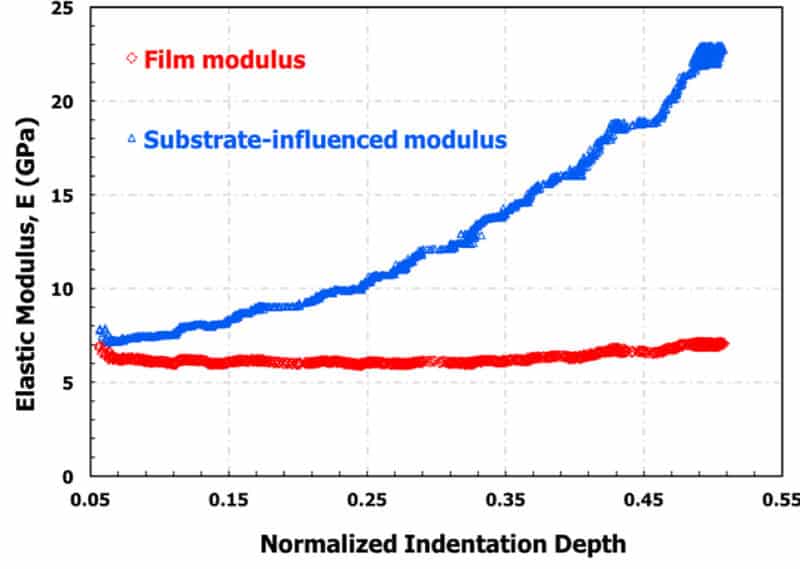
Continuous stiffness measurement is used to quantify the dynamic properties of the material, such as the rate of deformation and the effects induced by frequency. The CSM technique involves oscillation of the probe during indentation to measure properties as a function of depth, force, time or frequency. The option comes with a constant stress rate experience that measures hardness and modulus as a function of depth or load, the most common test method used in universities and industry. CSM is also used for other advanced measurement options, including the ProbeDMA ™ method for storage and loss module measurements and AccuFilm ™ measurements independent of the substrate. The CSM is integrated with the InQuest controller and InView software to provide ease of use and data quality.
Gemini 2D multi-axis transducer
Gemini’s 2D multi-axis technology provides the same performance as standard indentation on a second lateral axis, with CSM operating on both axes simultaneously. The additional information provided by this patented technique provides a better understanding of the properties of materials and the failure mechanisms. The two-dimensional force transducer is a unique solution for lateral force and tribology measurements and makes it possible to measure the Poisson's ratio, the coefficient of friction, scratches, wear, shear and topology.
NanoBlitz 3D
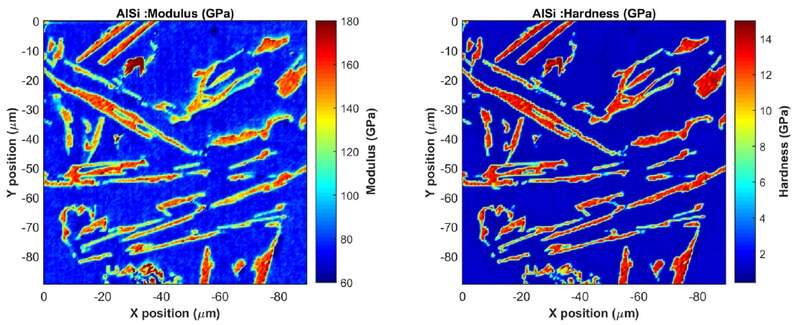
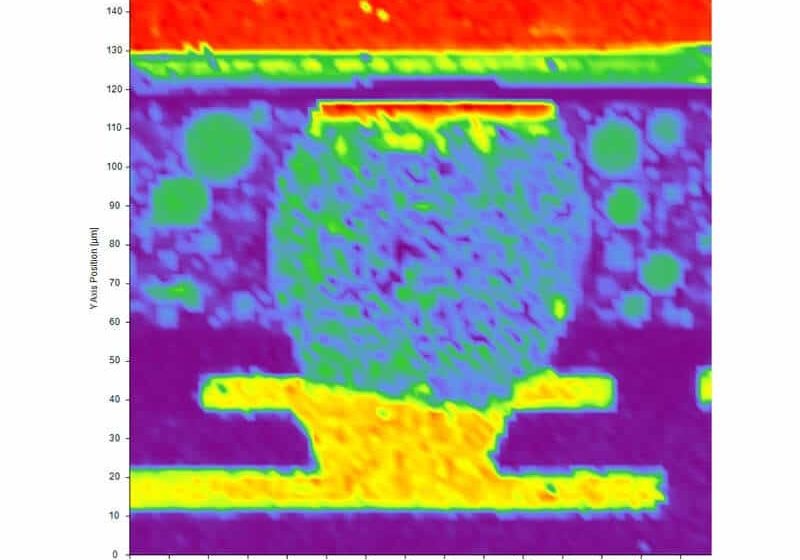
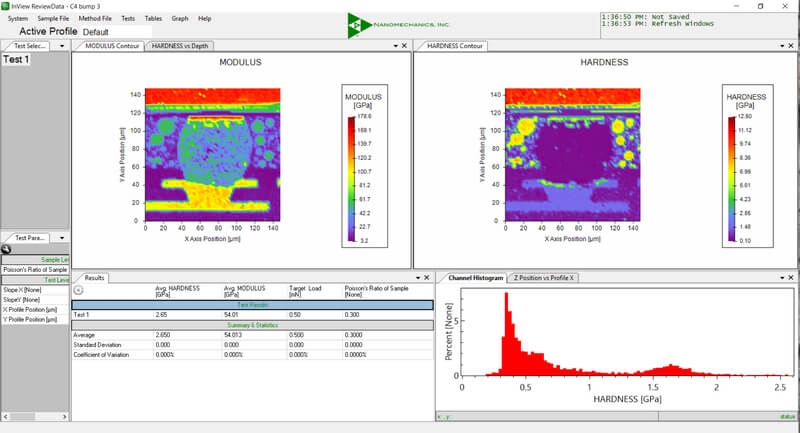
NanoBlitz 3D uses the InForce 50 or InForce 1000 actuator and a Berkovich tip to generate 3D maps of nanomechanical properties for high E factor materials (> 3GPa). NanoBlitz performs up to 100,000 withdrawals (300x300 matrix) at <1 second per withdrawal and provides Young's modulus (E), hardness (H) and stiffness (S) values at a specified load for each withdrawal from the network . The large number of tests allows increased statistical precision. The histogram graphs show several phases or materials. The NanoBlitz 3D package includes visualization and data processing functionalities.
NanoBlitz 4D
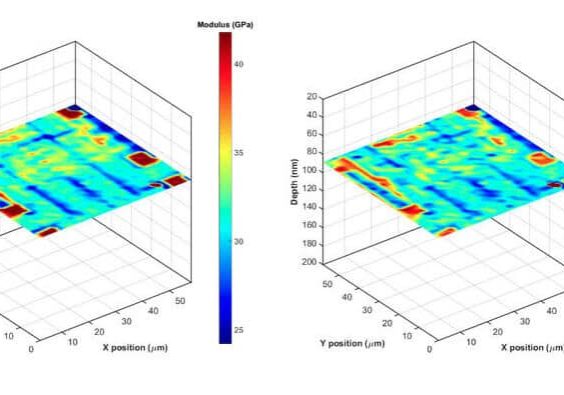
NanoBlitz 4D uses the InForce 50 or InForce 1000 actuator and a Berkovich tip to generate 4D maps of the nanomechanical properties of low W / O and high E materials (> 3GPa). NanoBlitz performs up to 10,000 withdrawals (30x30 matrix) every 5 to 10 seconds and provides Young's modulus (E), hardness (H) and stiffness (S) values as a function of the depth of each withdrawal in the matrix. NanoBlitz 4D uses a constant strain rate method. The package includes visualization and data processing functionalities.
AccuFilm ™ Thin Film Method Pack
AccuFilm is an InView test method based on the Hay-Crawford model to measure the properties of materials independent of the substrate using continuous stiffness measurement (CSM). AccuFilm corrects the influence of the substrate on the film measurements for hard films on soft substrates, as well as for soft films on hard substrates.
Biomaterials Method Pack
The Biomaterials Method Pack offers the possibility of measuring the complex module of biomaterials with shear modules of the order of 1 kPa, and uses continuous stiffness measurement (CSM). The pack includes a flat tip and a test method to assess the viscoelastic properties. This measurement technique is essential for characterizing small-scale biomaterials that are not well served by traditional rheometric instruments.
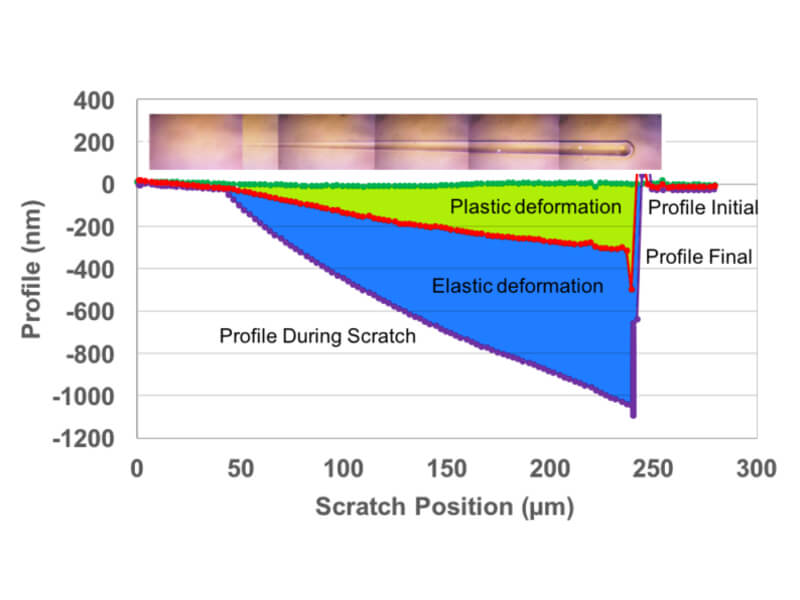
Scratch and wear test method
The scratch test involves applying a constant or ramped load to an indenter while crossing the surface of the sample at a specified speed. Scratch tests make it possible to characterize many materials such as thin films, fragile ceramics and polymers.
DataBurst
DataBurst allows systems with InView software and the InQuest controller to record displacement data at speeds> 1 kHz for the measurement of strain loads, jumps and other high-speed events. IMicro systems with the user method development option can also modify the methods for working with DataBurst.
Development of user methods for InView control software
InView is a powerful and intuitive platform for experiential scripting that can be used to design new or complex experiments. Experienced users can configure and perform virtually any small-scale mechanical test using the iMicro system equipped with the exclusive InView option.
True Test I-V Electrical measurements
Controlled via InView software, the True Test I-V option for the iMicro nanoindentor uses a precision ammeter and a voltage source, an electrical path crossing the tip and a conductive tip. This design allows the user to apply specific voltages to a sample and measure the tip current while simultaneously actuating the InForce 50 or InForce 1000 actuator.
Indentation tips and calibration samples
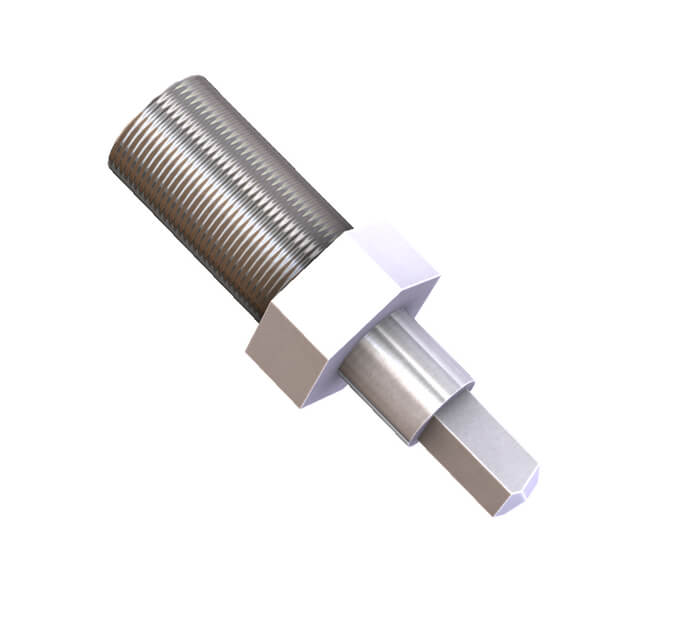
The InForce 50, InForce 1000 and Gemini actuators use interchangeable tips. A wide variety of vivid penetrations are available, such as Berkovich, cube corner and Vickers, as well as flat punches, sphere punches and other geometries. Standard reference materials and calibration standards are also available for the entire product range.
Contact us for more information on this product
Would you like an estimation ?
Additional information?
We will reply to you within 24 hours


